Project: Storage Shed – Part 5

Gino worked hard on getting more work done on the shed.

He worked all day trying to get the trusses finished but ran out of wood and daylight.

2013-07-21 003_edited-1

Got 2 trusses completed and on the roof.

We had a real scare when the end truss fell off the roof. Thankfully, no one was hurt but the sandbox took damage. So this area is OFF LIMITS (until construction is completed!!) to anyone under the age of 21! The end truss is braced and secured until tomorrow when he stops by the hardware store to get the screws he needs.

Project: Storage Shed – Part 4

This morning we headed out early to get working on the shed.

I mowed the lawn (never again!) while  Gino started work on the shed and Isabel set up in her sandbox.

2013-07-20 002_edited-1

Before work began, we had to move my hydrangea, which made it easier for Gino to get work done.

2013-07-20 003_edited-1

Last night he forgot to had the right support beam for the door, so he did that this morning along with adding the wall paneling.

2013-07-20 024_edited-1

Installing the small 6 inch door header.

2013-07-20 026_edited-1

He replaced the top support beam with a new one.
He later figured out that the pad slopes slightly to the south west.

2013-07-20 028_edited-1

Before heading in for some lunch, he got the window framed in.

2013-07-20 030_edited-1After lunch he got the walls completely covered and then continued working on the window.

2013-07-20 036_edited-1The window is in!

All our shed needs is a roof and door. Let’s take a look inside…

2013-07-20 044_edited-1

Left side of door.

2013-07-20 045_edited-1

Looking out the door.

2013-07-20 046_edited-1

Right side of door.

Tomorrow he begins the work on the roof. While I was getting Isabel into bed for the night. Gino made a jig for the 6 trusses he needs to build for the roof.

2013-07-20 049_edited-1

Cleaning up.
Tomorrow will be another big build day.

Project: Storage Shed – Part 2

Tonight after work, Gino headed out again to work on the shed.

2013-07-15 002_edited-1

He got the west wall up (with a little help from me).
Looks a bit odd right now but I’m sure he’ll be working on it again over the weekend.

2013-07-15 006_edited-1

Looking east.
West wall and north wall.

2013-07-15 008_edited-1

Looking north along east wall.
The south wall is going to take time, making sure he gets the window and door in right.

The 2 foot space around the shed is perfect for pulling weeds and getting debris from the trees.
I’m also liking the noise and view barrier that this shed has already provided.

2013-07-15 010_edited-1

The carpenter!
So proud of him and all his hard work he’s put into this project thus far. He still has a long way to go but with God’s help he can get it done! Way to go, Gino!

Project: Storage Shed – Part 1

Today we worked hard on getting some of the storage shed walls up.

2013-07-14 009_edited-1

Looking north from the patio.
It makes our yard, look so much different!

2013-07-14 010_edited-1Looking east form the north side yard.

Gino did a terrific job getting the wood cut and framed. He did the east wall first and then worked on the north wall, which seemed to go a lot faster then the first wall. The west wall will look like the east wall (above) but the south wall will be more work. The south wall will have 1 small window and door framing in it. I was there to help hold wood in place, lift things and get this or that tool.

Getting excited to see this finally go up! Getting all our garden tools and other garden stuff out of the garage is going to be a huge blessing.

Raised Garden Beds

We have been wanting to add more garden beds to the one (garden bed) that we had last year. So a few weeks ago we headed to the home improvement store to buy a pre-made raised bed. While waiting in line, Gino decided to just make a raised bed himself. So instead of getting a pre-made one we purchased cedar wood to make our own and saved over $50.00 in the process. It also looks nicer and sturdier! Looks awesome!

Gino cut the boards down to the dimensions we wanted and then later we treated the outside of the boards with an eco-friendly stain. Last weekend we put the beds into position and filled the top bed with dirt. This weekend we got more dirt to fill the lower bed and to get both beds ready for planting soon. We also purchased 3 large pots to place around the yard.

2013-05-19 001_edited-1Our new raised bed area looks so great!

Last weekend we purchased some plants as well. We purchased some filler flowers for the area over along the fence where I lost flowers to slugs! I had 14 plants and only 2 survived!!

We also got a beautiful “Let’s DanceMoonlight Hydrangea (which I planted today in the big blue pot) and a Black Lace Elderberry. The elderberry, we haven’t decided where to plant yet, so it’s just sitting in the garden bed for now. The flowers I will probably plant sometime soon, if the rains hold off long enough for me to get out and clean up the area where I am going to plant them.

2013-05-19 003_edited-1

We will fill the area around the beds with rounded stones (bigger then pea gravel).
The area where the standing water is, will have the same stones as well and will be the new spot for the hose reel.

2013-05-19 004_edited-1

Close up of the rounded stones that we placed in front of the raised beds.
Looks great with the paved walkway to the “shed”.

2013-05-19 005_edited-1This area will just be for my new potted hydrangea, can’t wait to see more blooms on it!

When we get the areas all complete, I’ll have to take more photos for now, you can what we’ve been up to for the past several weeks, in between rain showers and sun breaks.

Patio Makeover – Part 1

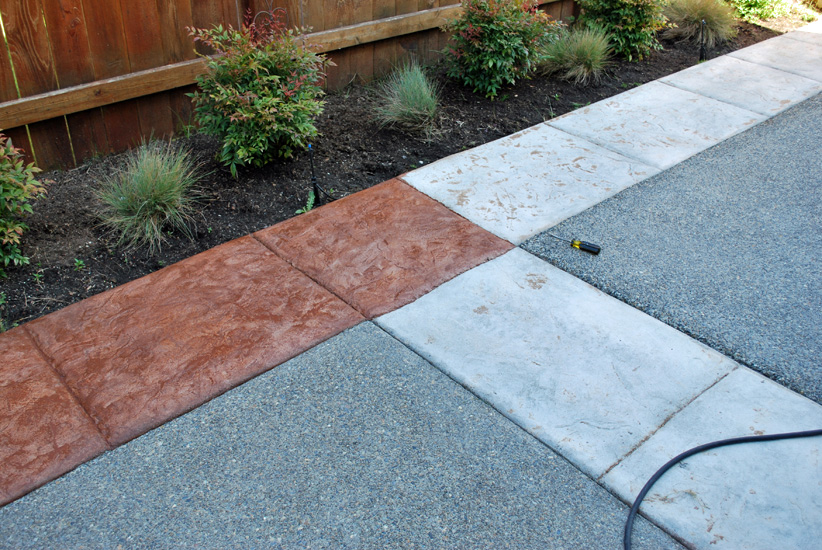
Since our patio was poured, stamped and stained a few years ago, we haven’t been happy with the color. It’s not what we wanted. So instead of hiring someone, again. We decided to do it ourselves.

So last Saturday, Gino started with a good power wash clean…

2013-05-04 014_edited-1

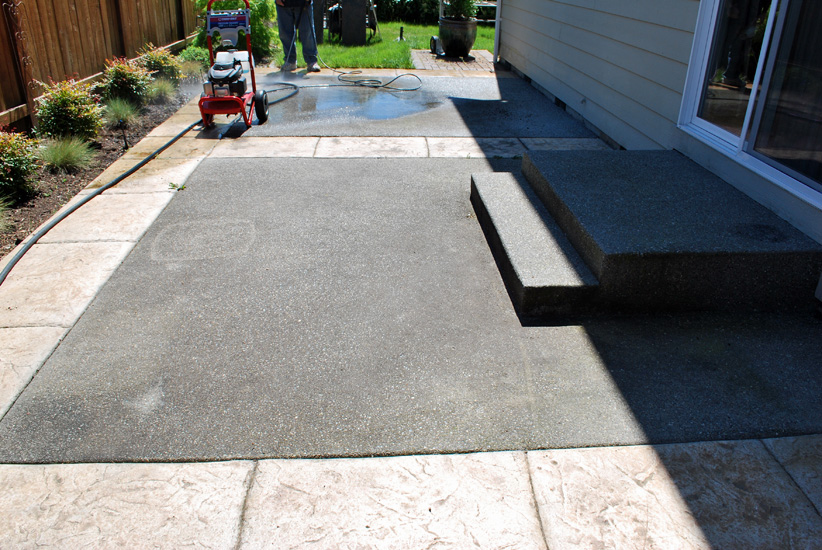
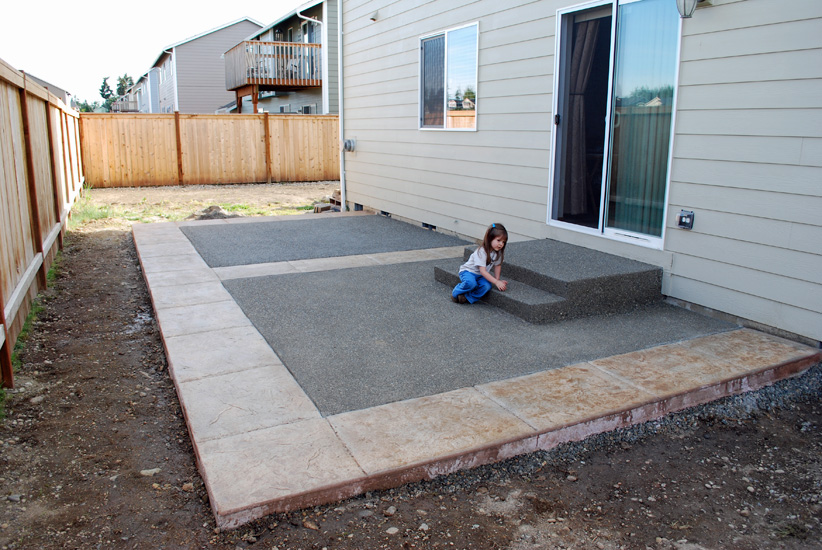
Looking south it doesn’t look so bad from over here.
The last time he power washed was 2 years ago.

2013-05-04 018_edited-1

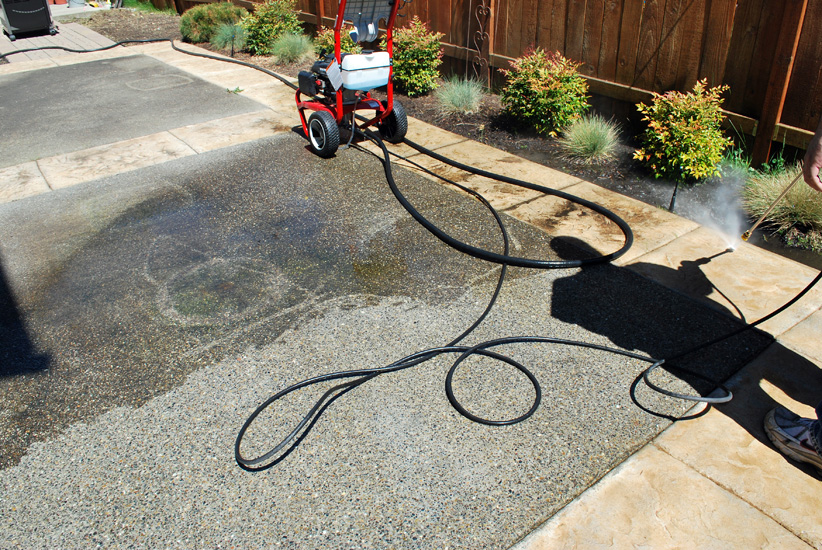
But when you come over to where he has already cleaned, you can REALLY see the difference!

2013-05-04 019_edited-1

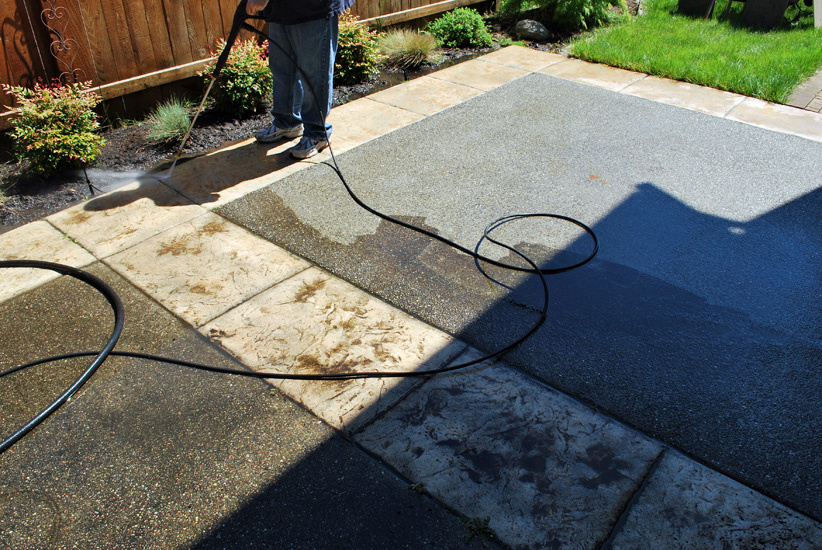
Black stinky (smelled like fish!) algae and moss clinging to the surface.
It’s really thick in some areas.

2013-05-04 030_edited-1

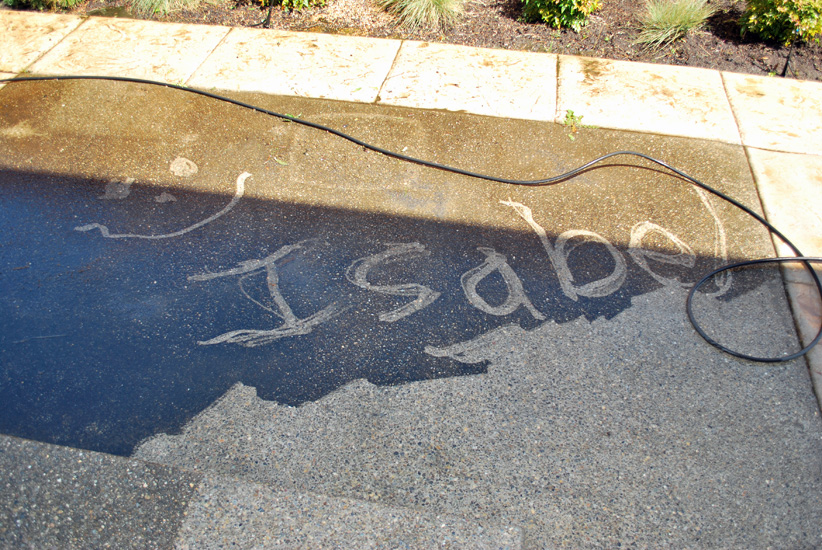
I took over the washing for awhile and had some fun with it. Isabel got a kick out of it too!
The area just left of the “I” in Isabel was the worst.

After power washing the surface, he stripped the old stain off (no photos). This took a few applications to do but eventually he got most of it off. What is left, will be covered up with the new stain and will give it character and depth.

2013-05-07 011_edited-1
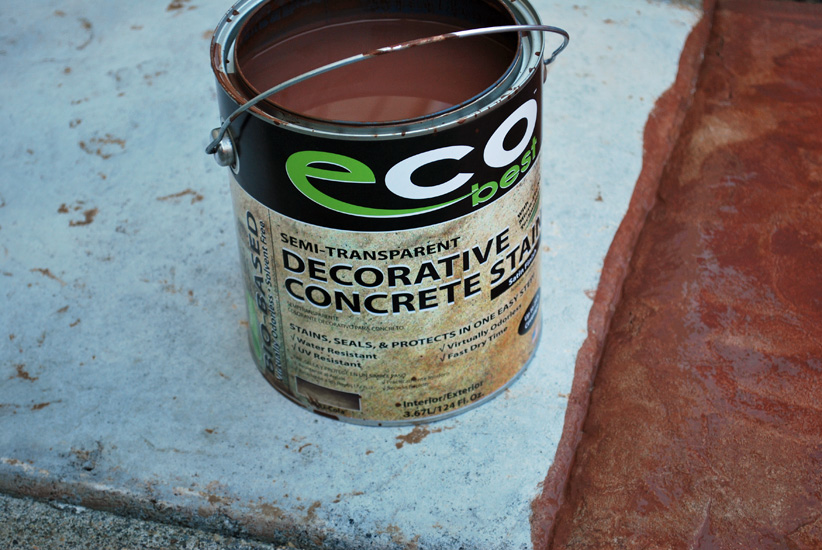
We decided to use an eco-friendly stain, stripper, and sealer. All of which are made by the same company. This product is soy based and almost odorless. We’ll see how it withstands our rainy season but so far it’s gre

2013-05-07 005_edited-1The color we choose looks really red in the photos but it actually dried more brown
(what we wanted!). The color name is, “Cola”. In the photos you can see patches of the old stain that still remained after several stripping attempts.

2013-05-07 008_edited-1
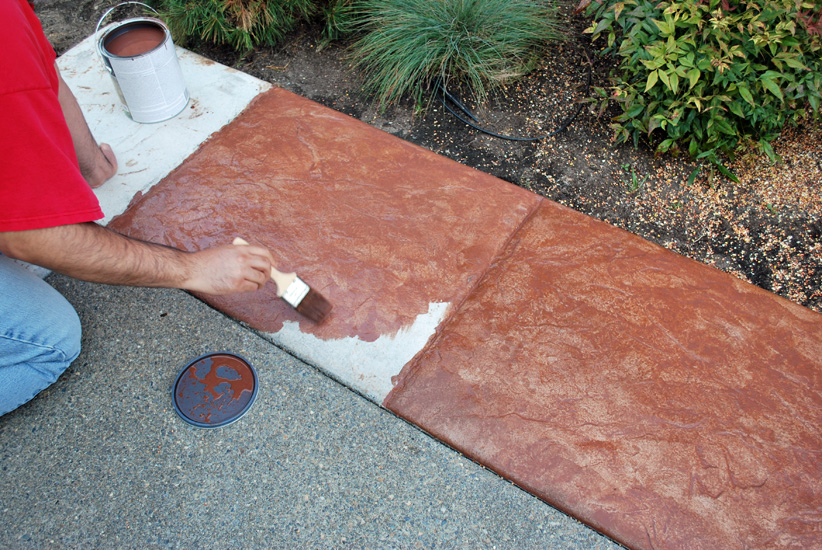
Application was with a brush. I tried it but couldn’t get low enough without hurting my wrists in the process. So Gino did it all by himself.

2013-05-07 015_edited-1

It looks great!

2013-05-07 017_edited-1

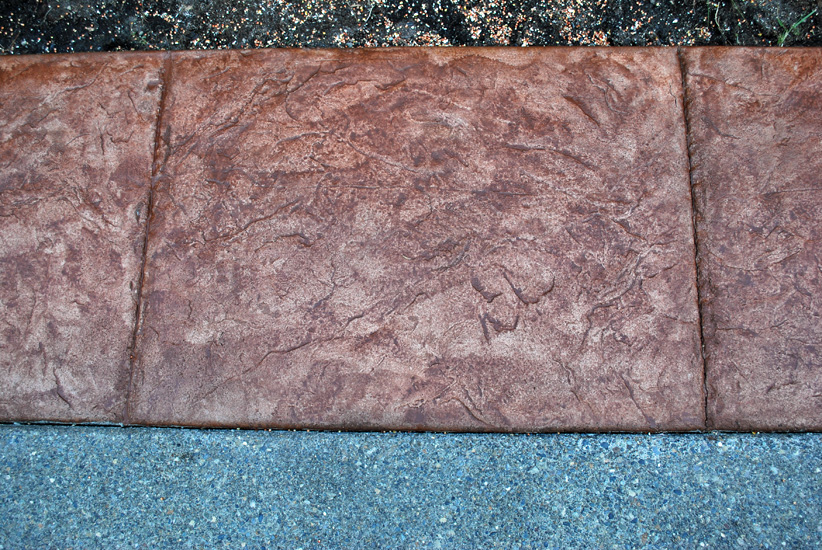
After 1 application and drying for about an hour, the red is gone and the brown really comes out!

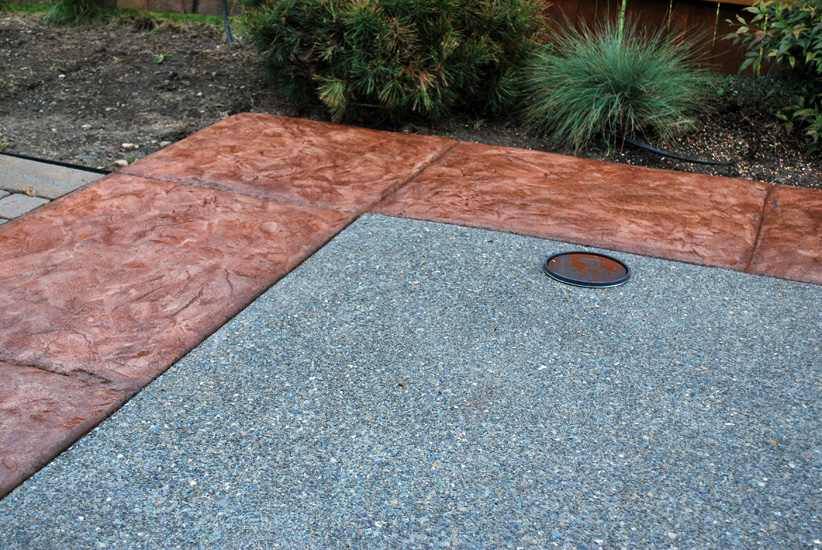
Tonight Gino finished up the staining of the patio.

2013-05-09 042_edited-1

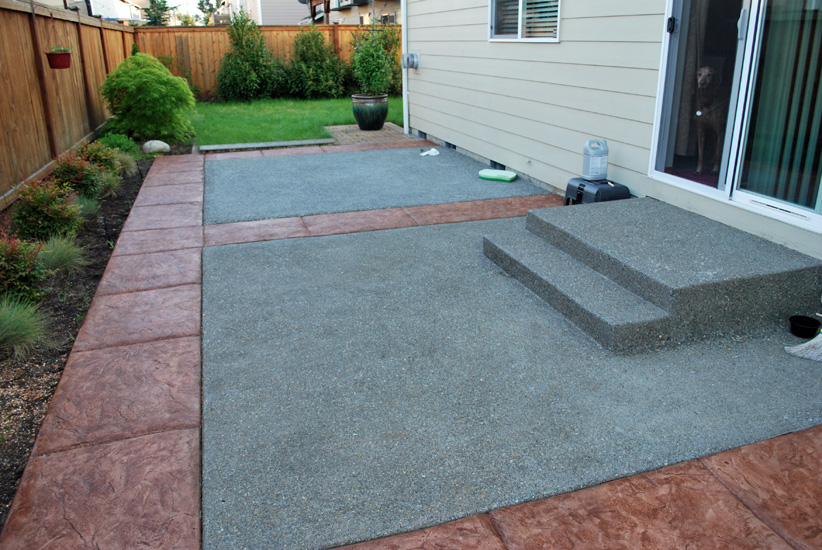
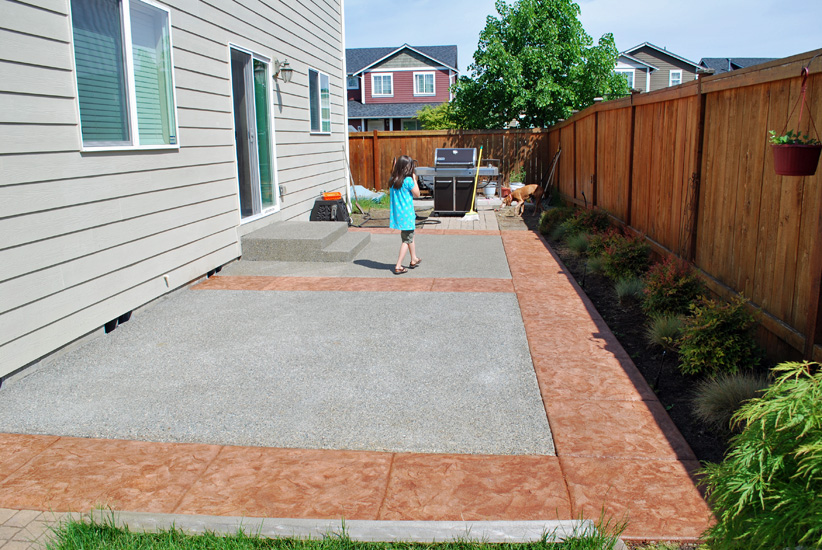
Looking south, all finished!
Just what we wanted!

2013-05-09 045_edited-1

Looking north, this side is a bit tacky still but it looks amazing!
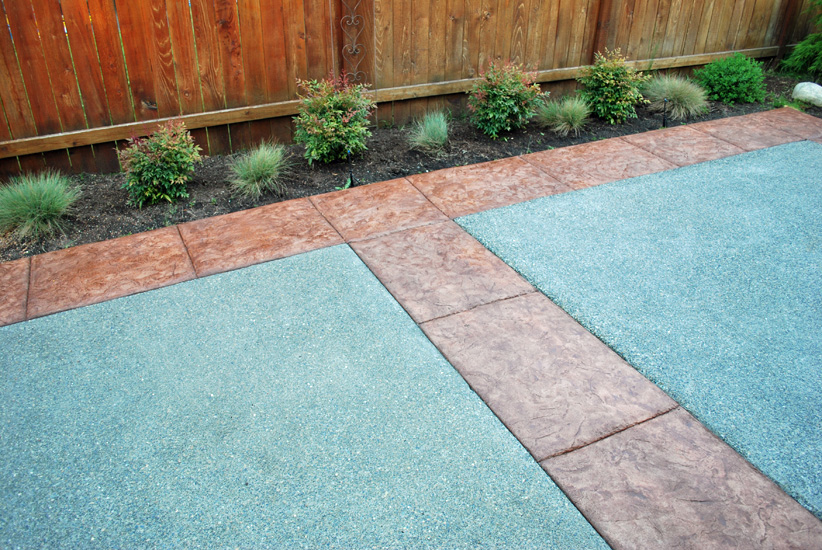
2013-05-09 050_edited-1

Looking east.
Fantastic job! Tomorrow he’ll begin to seal it.