How To Make Your Own Brown Sugar

Here are some recipes and tips for making your own brown sugar, perfect to use when you’re in a pinch or you may find you want to use it all the time rather than store bought.

Mix ingredients together well with a fork or with your hands. Store in an airtight container or sealed plastic bag.

Recipe #1 (makes 1 cup)

1 cup Sugar (white)
1 TBS Molasses (for light brown) or
2 TBS Molasses (for dark brown)

Recipe #2 (makes 3 cups)

3 cups Sugar (white)
1/4 cup Molasses

Recipe #3 (makes 9 pounds)

9 lbs Sugar (white granulated)
1 lb Molasses

Tips:

  • Try different varieties and measurements of molasses to see what you like best.
  • The darker the color of the brown sugar the stronger the flavor.

10 Ways To Soften Hard Brown Sugar

Picture of Brown Sugar - Tipnut.com

It happens to the best of us: rock hard brown sugar. How to soften it? Ten easy tips below:

  1. Place the brown sugar in an airtight container with a slice of fresh bread placed on top. Seal and leave overnight. It should be soft and fresh again in the morning, if not just let it sit another day or two.
  2. Sprinkle a few drops of water over the chunk of hardened sugar, place in a plastic bag, seal, and let sit for a couple days.
  3. Place brown sugar in an open container, then top with a moistened cloth (paper towel works too). Let sit overnight.
  4. Place the hardened sugar in an airtight container with a few apple slices. This should soften the sugar within the next day or two. Remove apple slices once sugar is soft again.
  5. Use foil or plastic wrap to cover the top of the sugar. Then set a dampened sheet of paper towel (not dripping wet) on top of the foil. Place in an airtight container and seal. Let sit overnight or a few days as needed. Remove foil and paper towel once the towel is dry and sugar is fresh again.
  6. Buy a clay disc or if you have a pottery piece on hand (from a broken clay pot, etc.), set it in water for about 30 minutes. Dry the piece so it isn’t dripping wet. Put the clay piece in a container with the sugar and seal. Check after a few days. Keep the piece in with your sugar for months if you’d like–will keep it soft.
  7. Quick Tip #1: Need the sugar soft now? Put the brown sugar in a container and place in the microwave with a small bowl full of water beside it. Microwave for about 1 minute–check. If it’s still hard, try for another 30 seconds. You can keep doing this until the sugar is soft, but watch that you don’t melt the sugar.
  8. Quick Tip #2: Place the hardened sugar in a baking pan and set in oven (temperature at about 250° F). Check after 5 minutes. If still not soft, continue checking every few minutes until it’s soft and ready to use.
  9. Quick Tip #3: Place the brown sugar chunk in a microwave safe plastic bag. Take a square of paper towel and moisten with water (not dripping wet–wring out excess). Place the wet paper towel in the bag with the sugar and seal. Place in the microwave for approximately 20 seconds. If still not soft, microwave for a few seconds more, repeating until the sugar is ready to use. Be careful not to melt the sugar.
  10. Quick Tip #4: Stick chunks of the brown sugar in a food processor or blender and chop/pulse until useable.

For best results, make sure to store brown sugar in a sealed, airtight container. A clay disc kept in the container can keep it soft for months (see tip above for clay disc).

Brown sugar can also be stored in the freezer and thawed a few hours before using.

Beads

When we were in Utah, Isabel and her cousin Bryndee played with Pop-it beads that Bryndee has and Isabel enjoyed them. So after returning home, I kept my eyes open for them and we finally found them! We have been making all kinds of jewelry creations since!

Isabel showing off some of our creations.

All the jewelry we made this day…rings, bracelets, and necklaces.
Isabel loves making all kinds of creation with these beads,
she plays with them almost every day!

The drawing board

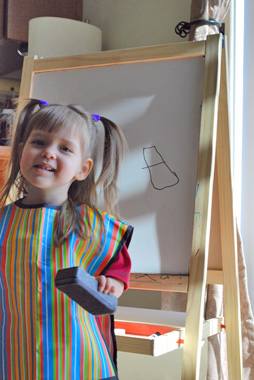
Isabel got her easel this last Christmas but she hasn’t really used it in awhile so whenever she decides to draw, I always want to capture whatever she produces. This morning she asked me if she could and I was ready to sit back and enjoy the art show! Enjoy!

A letter “A” – she however looped the side lines around.

This is all Isabel! All I did was put the three blue dots, she did all the rest…body/head, mouth, arms, hands, legs, and feet. I was totally impressed with this little guy I had to take a picture! Well done!!

A fish.

Now it’s just about time for a nap!