Post rocks!

Yesterday, Gino got down and dirty with getting the rocks out of the way for the last fence posts. The first rock didn’t take him that long to get out; a few heavy whacks with the digging bar (which Gino calls the “Intimidator”) and out it came. The second rock however took a bit more time, a lot more whacks and a great deal more sweat to get out.

The first rock. It actually broke – hurray!

The second rock; I’m guessing probably weighs around  20 lbs. or so.

Fence Posts

Today we worked on getting the posts in the ground with the cement. My job was to make sure the posts were square and level; while Gino mixed and poured the cement.

Cutting the posts down.

Post placement on the north side of house. Minus the 2 where the holes need to be re-dug.

Back yard looking north.

Gino rented a cement mixer to get the job done quicker. Very nice.

We started with these five posts along our neighbors yard and our garage.
Then we worked along the back corner over to the street and then back around to the front of the house. This first day we got 13 posts cemented into the ground. Way to go!

Post hole marking and digging

So the next project work day, Gino went out and measured out where 23 fence posts were going to be located along the property line. After that; the following day he rented a post hole auger to drill the holes. Which worked out rather well since he ended up only having to dig 4 by hand because the auger hit BIG rocks.

Ok so this is a little odd one…Gino was marking the ground with this marking paint and was showing me how to use it to paint some stakes that he needed. Well, he paints this word on the ground and neither one of us says the word. So we go about our business; Gino measuring for the stakes and I marking the stakes with paint. Well, Isabel is out walking around playing in the dirt and what not. When she walks over to this word painted on the ground and reads it! “Hi” she says. I was blown away! Smart kid.

This is a view of the back of our property. Our posts will be located were the orange stakes are.

Today Gino rented a post hole auger to drill his holes for the posts.

Each hole was between 20 and 24 inches deep depending on how big the rocks were.

Dirt moving

Our next project that we tackled was moving 12 cubic yards of top soil from one side of the house to the other. We took about 5 days to move it with our little wheelbarrow. Gino did most of the moving and I tried to help when I wasn’t keeping Isabel entertained.

Some of the top soil we had moved over before Gino had started the paver pathway however that had gotten very compacted from the truck with the many loads of gravel/sand and paver’s. Nevertheless, we broke it up and moved the soil over by the pathway and then began moving the remainder of the top soil from the other side of the house.

Clearing more of the larger rocks before bringing in loads of the top soil.

Taking those larger rock loads over to the empty lots.

Our little helper.

This is where the top soil was located on the other side of the house.

All the top soil is moved! Hurray!
The morning these photos were taken, we had a summer thunderstorm (hence the small lake of water) with thunder and lightning during the night. Which was very cool because we don’t get lightning all that much.
By the way, the tarp is covering leftover sand from the paver pathway project; which Gino will use to complete the pathway around the house to the patio.

Now it’s time for the fence…

The path less traveled – part VI

Paver project – Day 7:
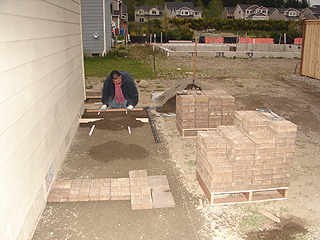
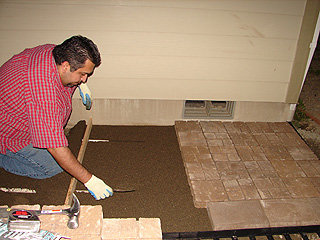
The day started out with Gino renting a stone cutter (that’s probably not the technical term) to trim down some of the paver’s around the edges. He wanted to get all this trim cutting work done before leaving for vacation in a few days. It worked out really well!

paverpathday7_1.jpg
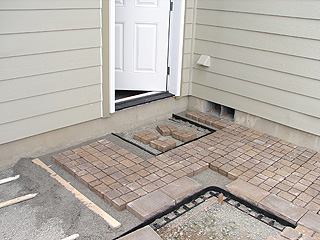
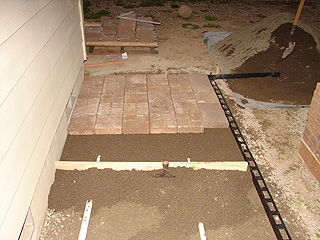
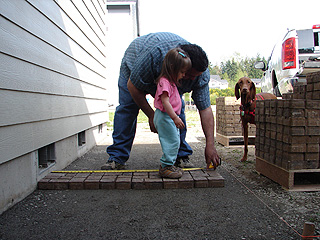
Making sure the paver’s fit just right around the step.

paverpathday7_2.jpg
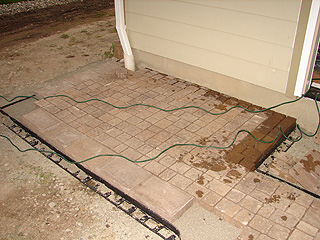
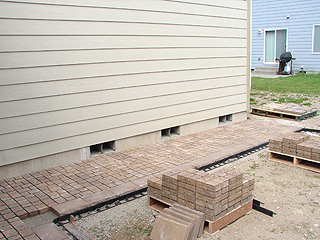
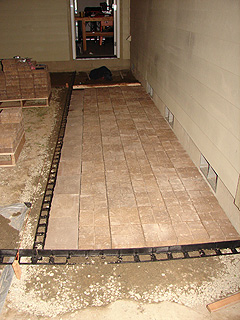
The edge close to the garage wall looks really nice.

paverpathday7_3.jpg
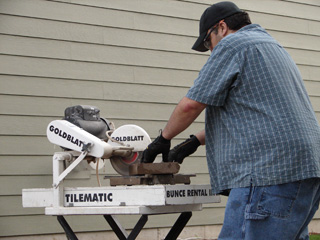
Using the masonry saw (technical name) and making sure we measure twice and cut once.

paverpathday7_4.jpg
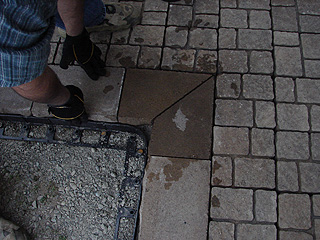
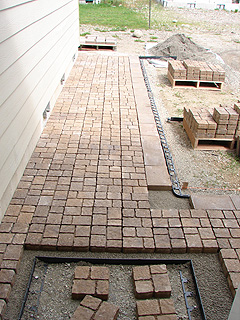
Look at that cut. Perfect!

paverpathday7_5.jpg
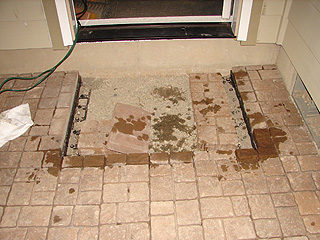
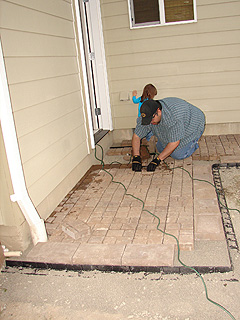
The area were the step will be, he is going to work on later (after vacation).

paverpathday7_6.jpg
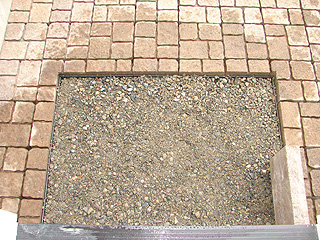
The step area with some added leftover gravel/sand mix. Which Gino later took out because it raised the block and paver’s up to high to the door.

paverpathday7_7.jpg
Finished paver walkway. It looks so good!

paverpathday7_8.jpg
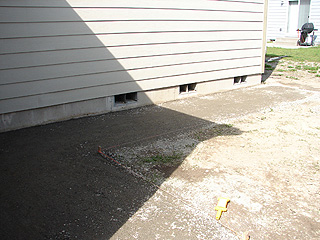
Finished corner (besides the step).

paverpathday7_9.jpg
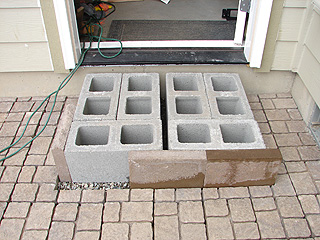
Sneak peak at the what the step will be made of. Cement will fill the the holes of the concrete blocks and brick morter will hold the pavers down onto the step. When the project is complete I’ll take more photos.

The path less traveled – part V

Paver project – Day 6:
Well, it’s coming along. How does it look? Gino has been going out in the evening and working hard on our pathway. He’s doing a really good job! It looks awesome!

paverpathday6_1.jpg
Corner area.

paverpathday6_2.jpg
Pathway to backyard. The area beyond that (on the right upper hand side) will also have a pathway as well leading to our back patio slab. Where the pallets are located (in the foreground) that area of yard will be grass for Isabel to play in.

paverpathday6_3.jpg
This “hole” will be for a step. The other “hole” areas will be filled with pavers that Gino will have to cut.

paverpathday6_4.jpg
Gino will finish this off out to the corner of the garage.

paverpathday6_5.jpg
Looks awesome! Good job honey! :o)

“Therefore, encourage one another, and build up one another…”
1 Thessalonians 5:11  NAS

The path less traveled – part III

Paver project – Day 4:
Isabel and I headed to church that morning while Gino stayed home to finish up using the compactor; that needed to be returned to the rental place by 1:30 pm. After we returned home from church and returned the compactor, we headed over to Lowe’s and purchased 250 pavers. Unfortunetly, we didn’t make it back over to the landscape place to get a load of sand. Which was alright, Gino picked that up on his way home from work the next day.

paverpathday4_1.jpg
3 layers of gravel/sand mix compacted to 6 inches.

paverpathday4_2.jpg
Pallet of pavers.

paverpathday4_3.jpg
Break time from unloading pavers.

paverpathday4_4.jpg
Checking on wideth, “feel”, and look. We decided to add a matching border which will be placed along the outside edge about where Gino’s hand is.

paverpathday4_5.jpg
Isabel just goofing around on the pavers!